Kids Office/ Lounge
Creating an inspiring space for my children to do homework and a comfortable place to read has been on our to do list for the longest time. Thanks to Fiskars, I was given the necessary push to do it. We have a loft space that’s perfect for this project.
I was gifted these FISKARS party kits which you can find at you local JOANN stores. These kits are super fun for so many things. Let’s start with the obvious though; parties! You can DIY your own custom parties, create party crafts, and so much more. One thing that I thought was cool about these boxed kits is that you can scan the QR code which will direct you to fun projects that you create with each kit. I, however, thought they would be a nice touch to the kid’s office space. Wanna know how I used them? Keep Reading!

One thing that I struggled with when working on this project was my children’s age and what space they would enjoy growing up in. They are currently in the preteen age group so I can’t design anything too young or too mature.
The Before


Lucky for me, I started with a clean, blank slate. When designing the space, I started with the functionality. As mentioned earlier, this shared space will be used as an office for my children to do their homework, arts and crafts, and a peaceful place to read. To accomplish this, dividing the space in two was the best plan. I love how this space turned out! The details are my fave. Let’s discuss!
THE OFFICE
For this space, I purchased white furniture that would pair well with this space; very simple with clean lines. Since the furniture was quite simple, a bold statement wall was perfect. A peg board with shelves was the perfect addition to organize all of their supplies and important papers. Within this space, I really honed in on the details because to me, this is what ties everything together.


Jars. I love jars of all sizes for this office. Jars in a variety of sizes are great because it can house crayons, pencils, markers, all of the things! Clear jars can be a bit boring so we thought it would be so much fun to decorate one up with confetti! The best part about this project is, the kids and I created our own confetti using the Fiskars Confetti Making Kit. This project was quite simple to create. Here’s how we did it:
Cut out confetti with multiple colors of cardstock.
Brush clear glue onto the bottom quarter of a glass jar.
Sprinkle the confetti onto the jar and allow to jar for a couple of hours.
Dust off any excess they may not have adhered to the jar and you're finished.
I love how this pencil holder came out. It's a quick and easy project that you and your kids can do. Trust me, they would love it!

Bins. Another simple way to organize your kids supplies and house books (that may not look aesthetically appealing to the eye if placed on the shelf) are bins. My suggestion is to grab the wood ones and paint them whatever color you want. I'm always down for diy/ customization. It’s personal and you're not limited with whatever is available to you because you can create it yourself.
Peg Board Clips. I love these clips because it allows for important paperwork to be in plain sight. One thing we had fun creating was a chore chart for our children. This helps to give them guidance each day with what task they should be completing for each particular day. They post a fun, little marker for each task they complete for the day. The Fiskars Kids & Baby Party Decoration Set was perfect for creating our chore chart.
Now, ignore the name of this kit. The contents inside is what my preteens had so much fun with. This was another quick and easy project. Allow me to share how we did it:
Create a chore chart on the computer that would work well for your family. We listed all the chores on the left and left 7 empty boxes to the right which correlated to the days of the week.
Using double sided tape, adhere the chore chare to cardstock.
This kit has so many fun stamps in this kit. Choose a stamp and stamp 7 times on a sheet of cardboard. Allow to dry.
Using the hole punch that’s included in the kit and cut out each stamp.
Repeat steps 3-4 for all of the chores you have on the chart.
That’s it! When you child has completed a chore, use double stick tape to stick the marker they created onto their chart.


This is a fun project for kids because it makes them feel so important when they see that they have duties and roles within the household. Now, they may not like the actual work, but marking off a completed task may be the best feeling for them just like it is for alot of adults.
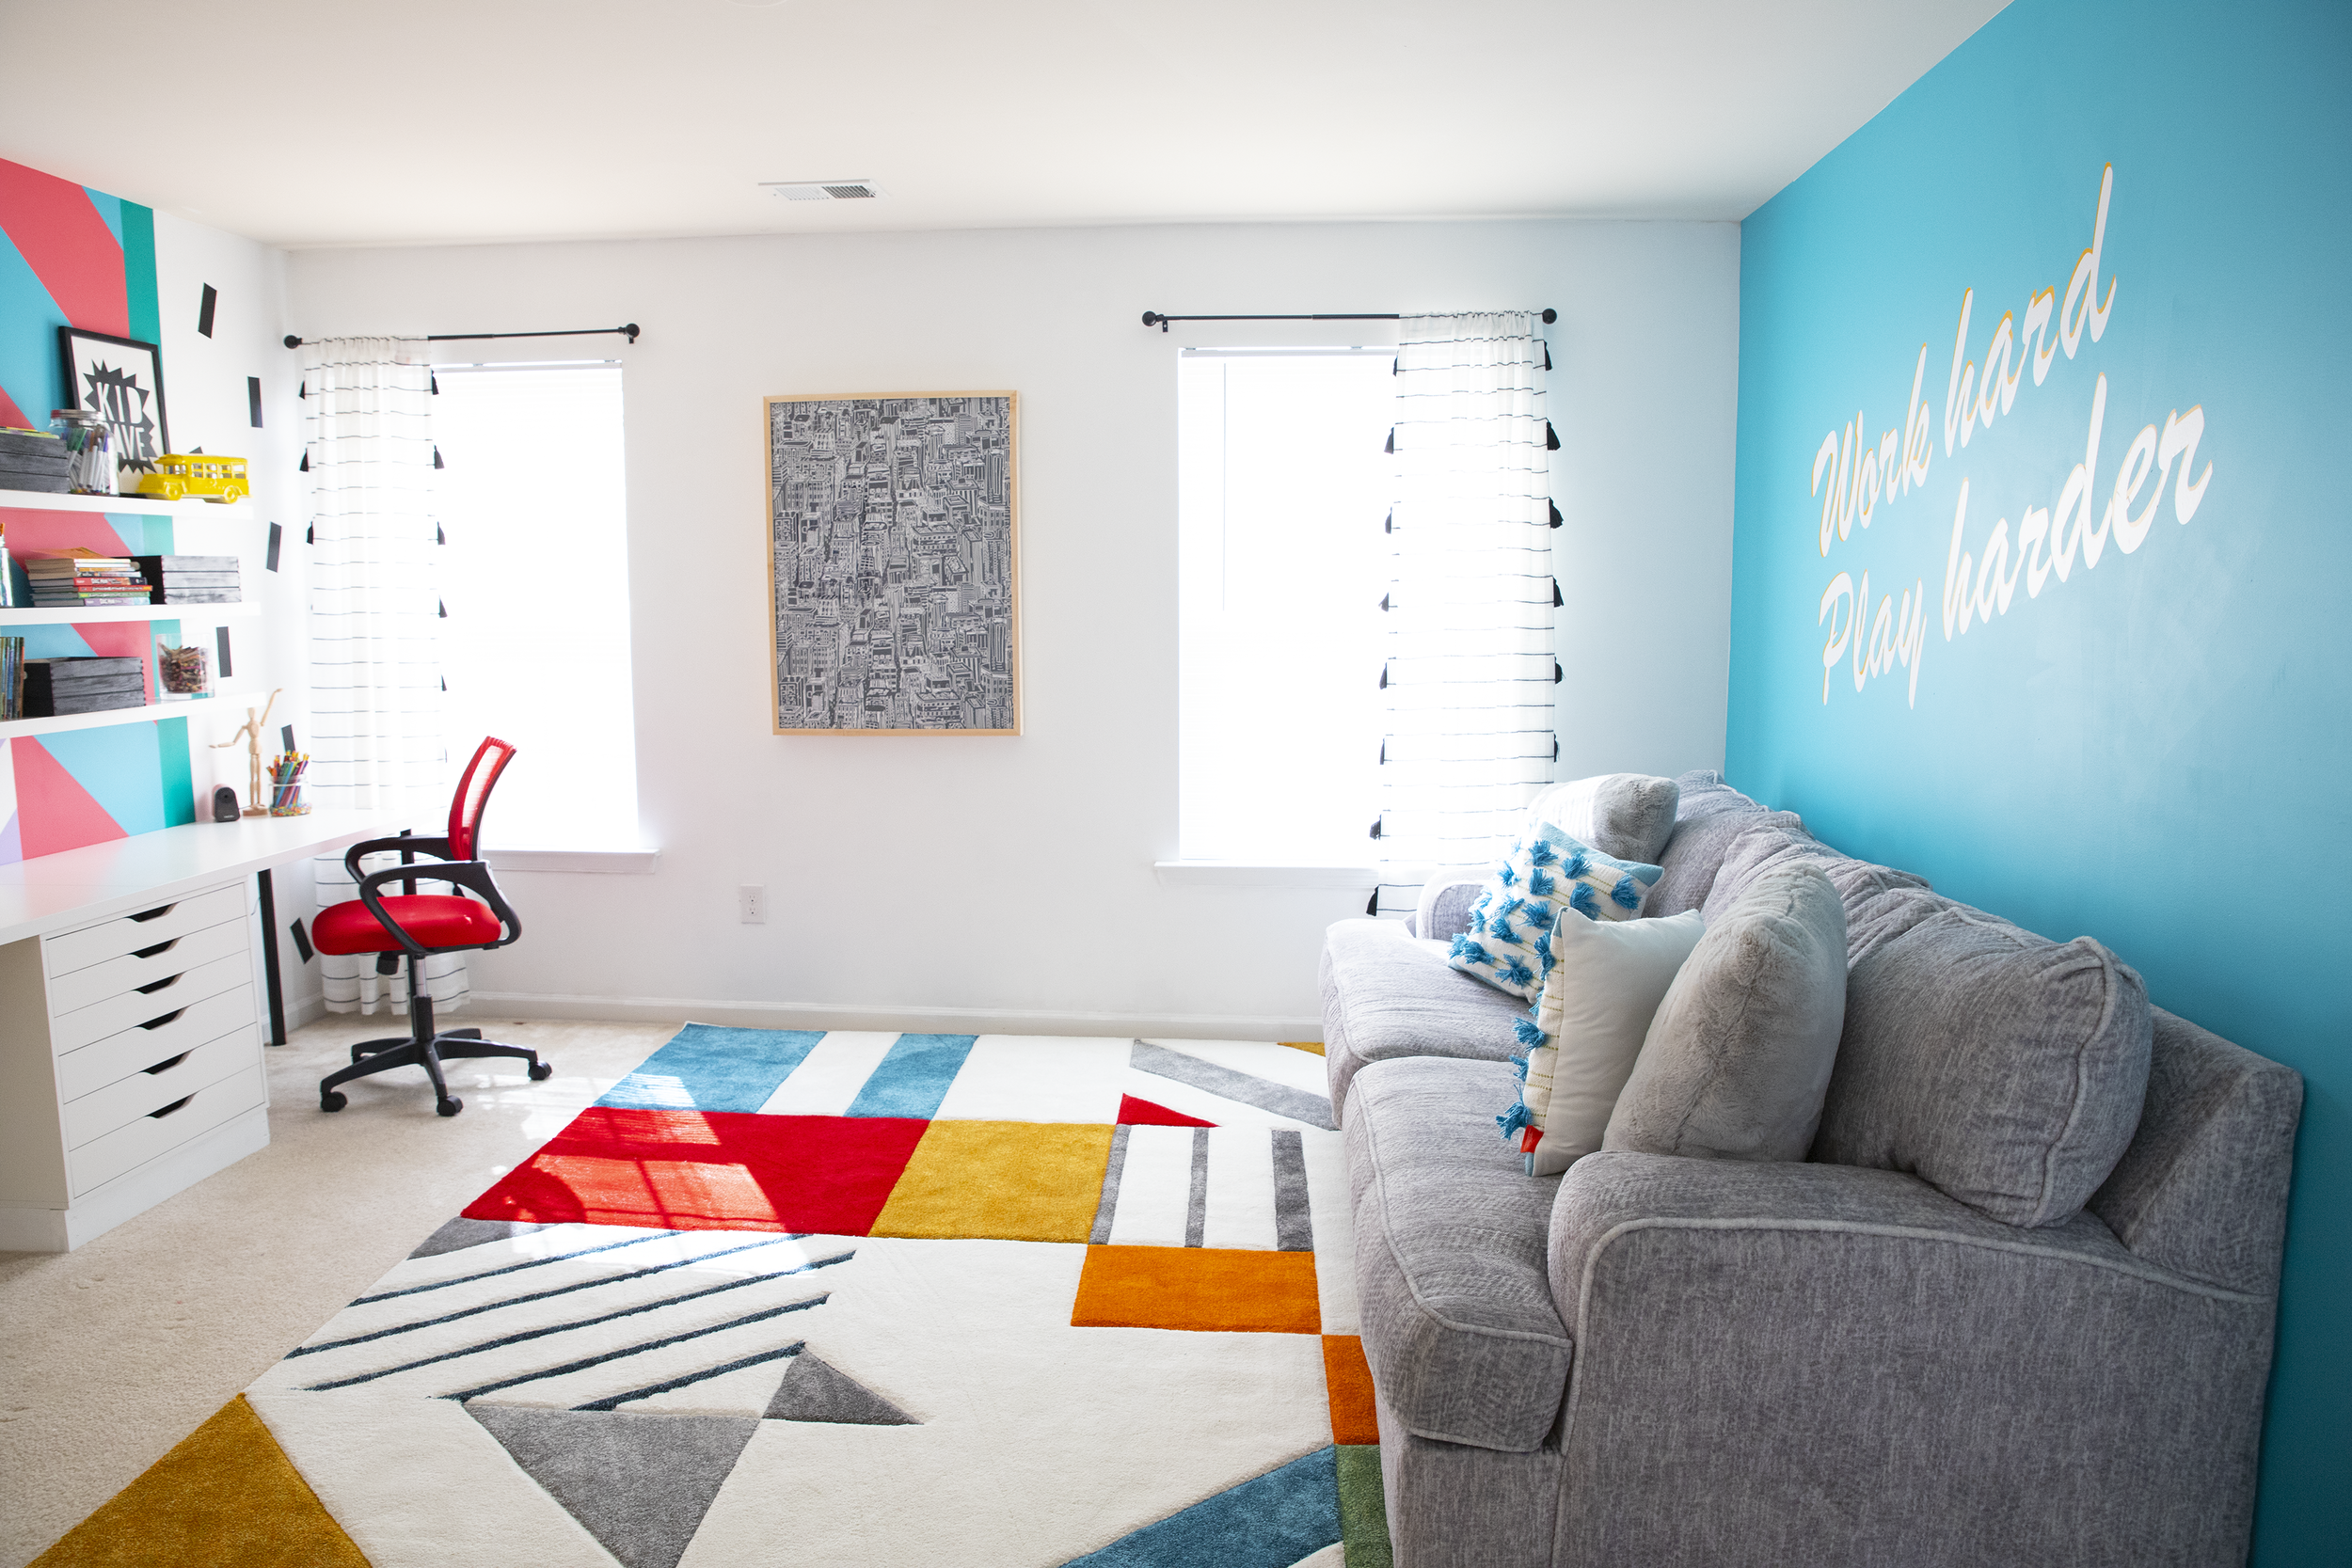
The Lounge
In this area of the loft, the most important part was definitely the couch. LOL! (not fun. I know.) A soft, comfortable spot for my children to unwind or curl up with an adventurous book was important for. This couch feels like the biggest hug. The kids absolutely love it. Ok. Enough with couch. Let’s talk about the design.

As you can see, it’s pretty simple. I wanted to create a mural on this wall with an inspiring quote. “Work hard. Play Harder.” was perfect given the function of this space. I want them to read this quote everyday to remind them that nothing comes easy unless you work hard BUT all of the hard work would be in vain if they didn’t stop to take a break and have fun. I want them to be happy and have the best life without work too hard.

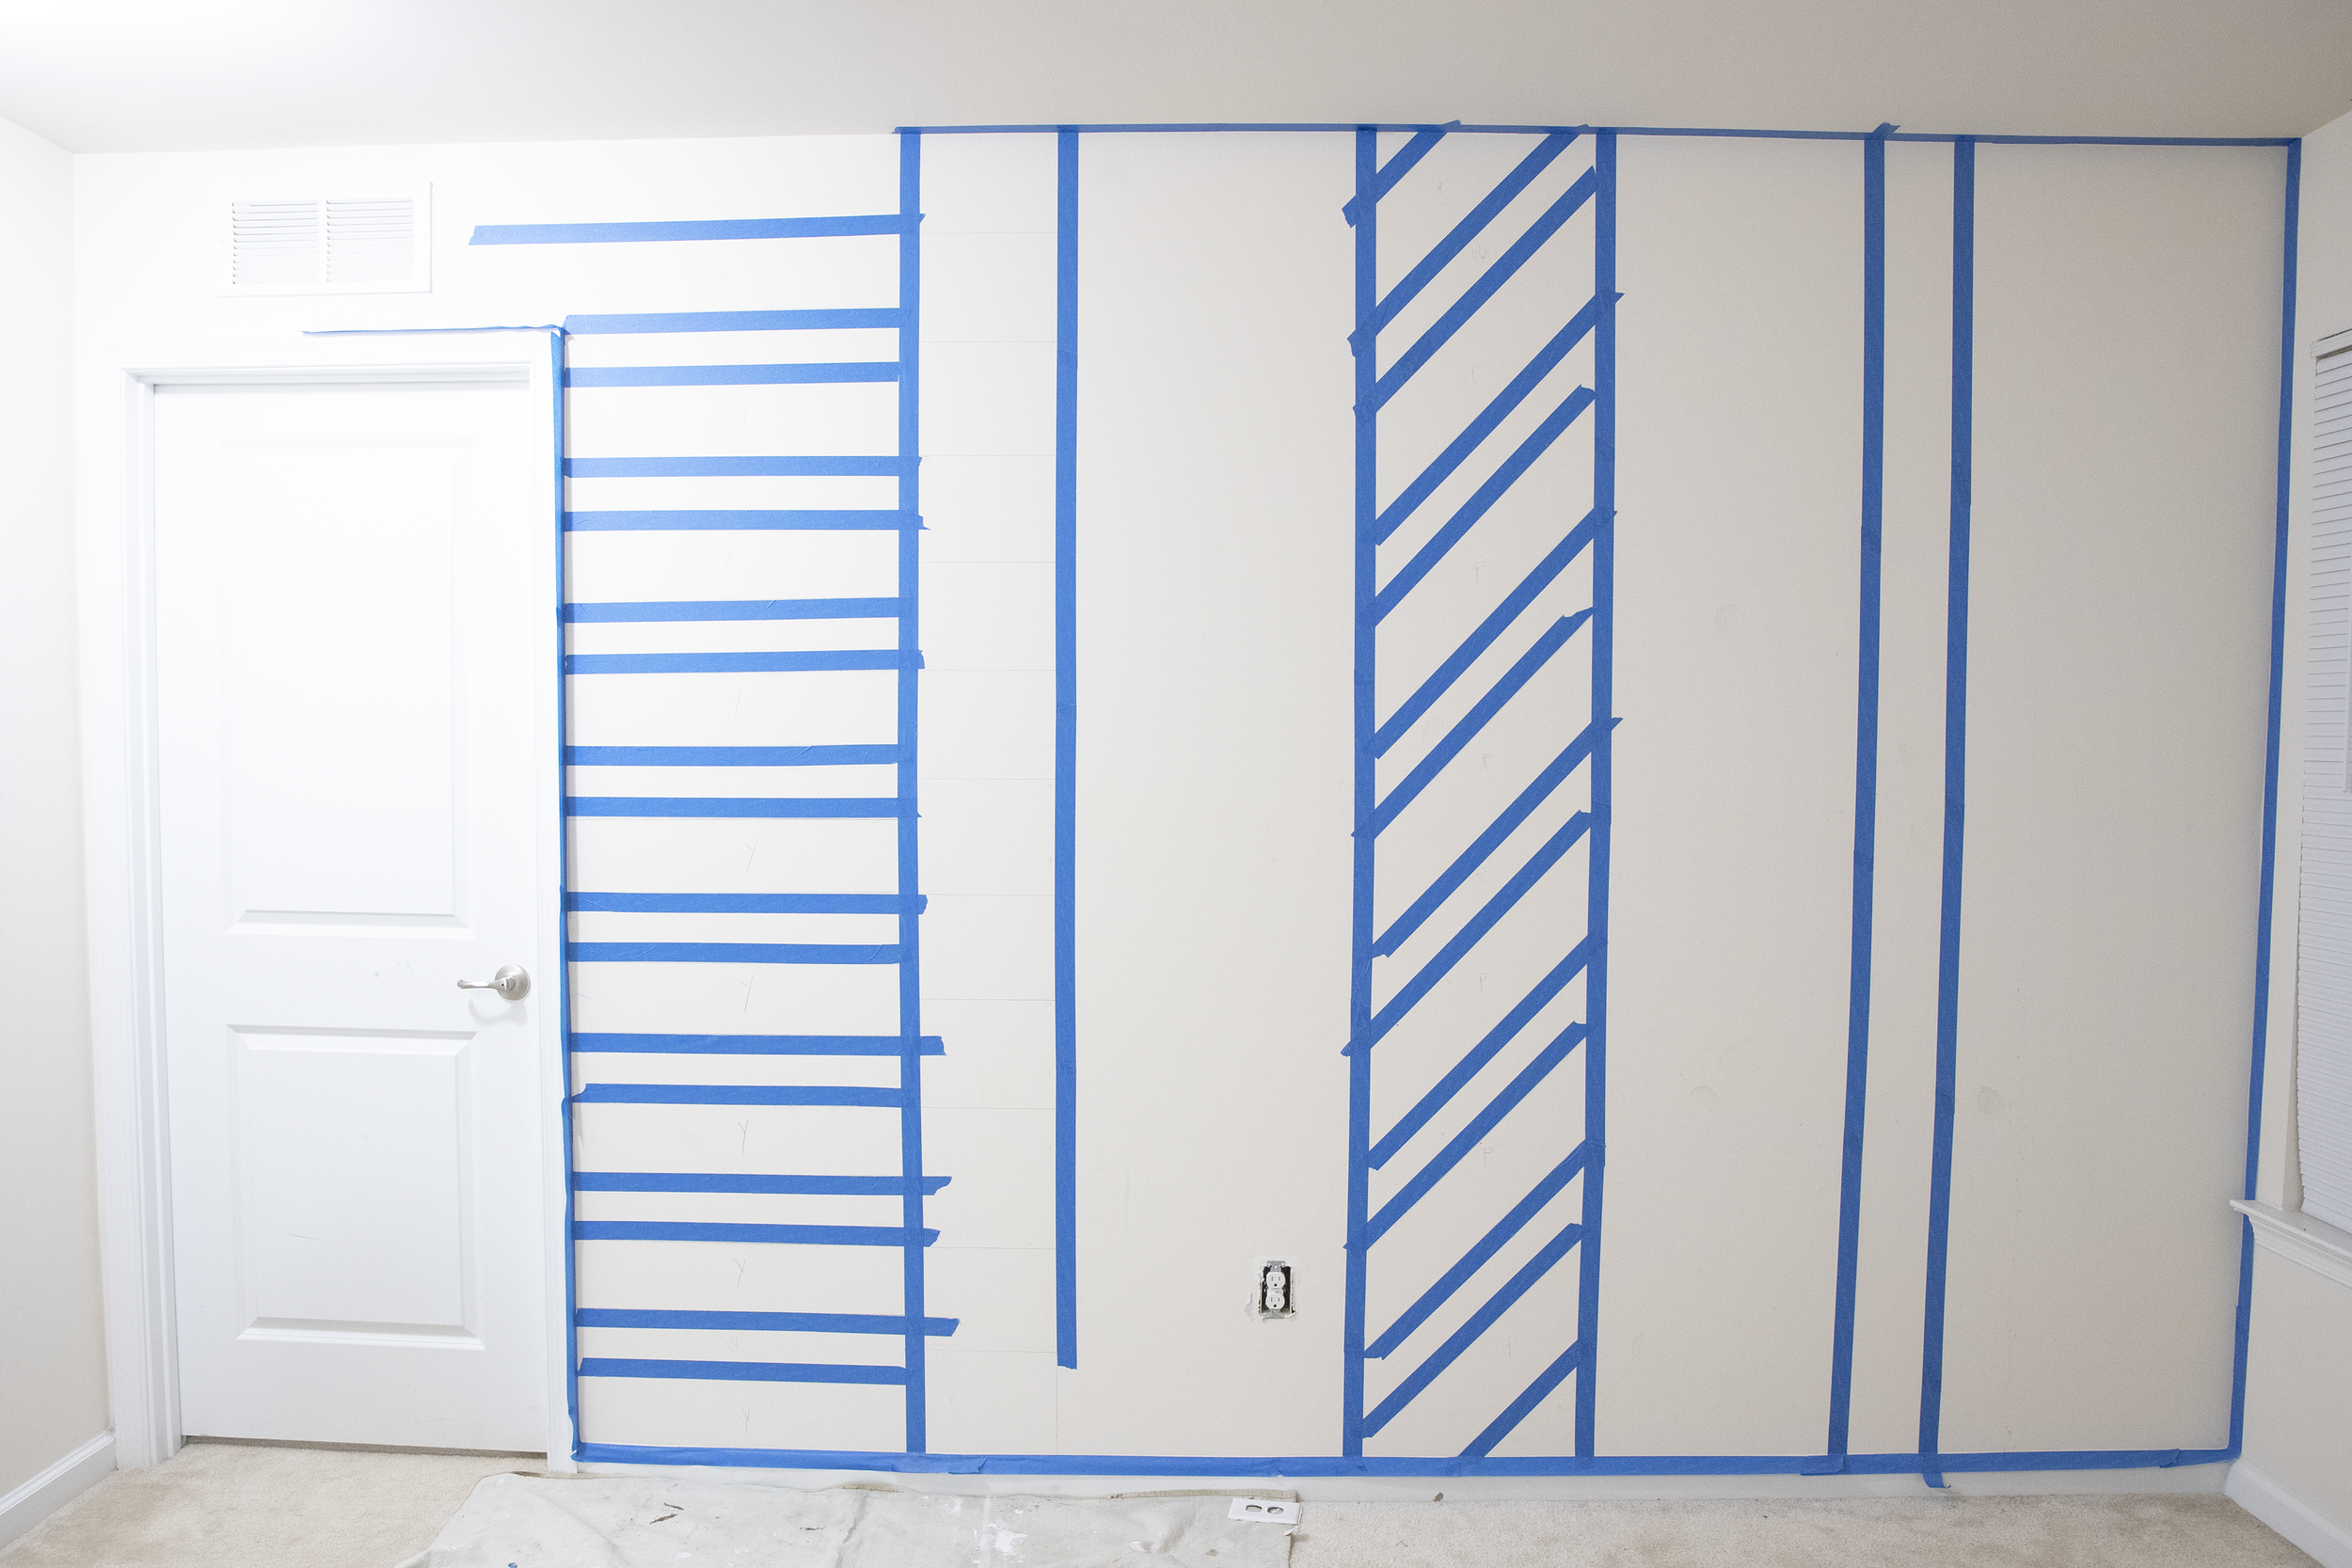
We have this pocket in the loft. It’s a small wall. It’s perfect for one art print, but I thought that a pennant wall would be even better. Oh my goodness! We are obsessed with this project!On each flag are all the places that we want to travel to or been to, but would love to go back. One day, I want the kids to look at the wall and say “We’ve been to all of those places!” How cool would that be?! Our family loves to travel so creating this project was super fun because we all yelled out all the places we want to travel to. Wanna know how we created this project? Allow me to share:
Using the Fiskars Banner Creation Set, we cut out several pennant flags in multiple colors.
We added a border to the back edge of each flag to make it look more like a pennant.
Using my craft cutting machine, I cut out all the places my family want to travel to and adhered each one to its individual flag.
Finally, we attached each flag to the wall by alternating each color using double-sided tape.
This wall gives us something to look forward to and it gives us a visual for what trip we should go on next. How fun is that?!


I hope that you all enjoyed the design of this space. I’m so grateful to have the opportunity to design each space in my home with the help of amazing sponsors like Fiskars. Thank you Fiskars for your support and this opportunity.