Little Gentleman

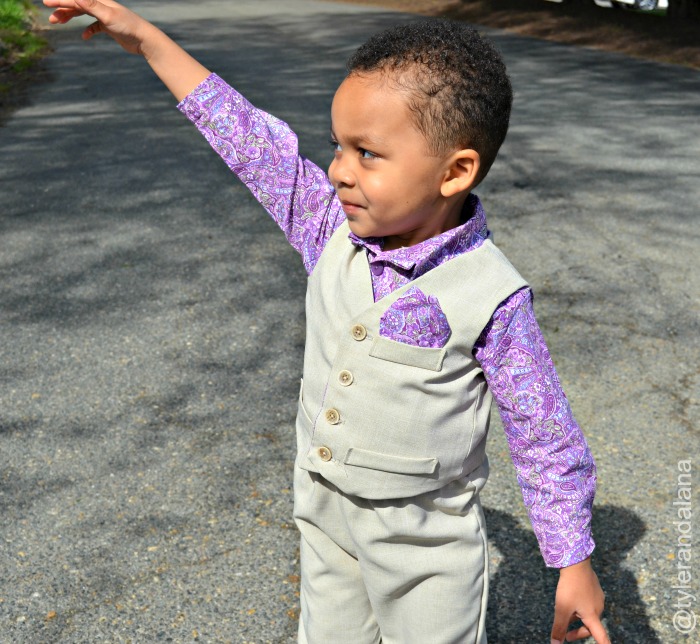
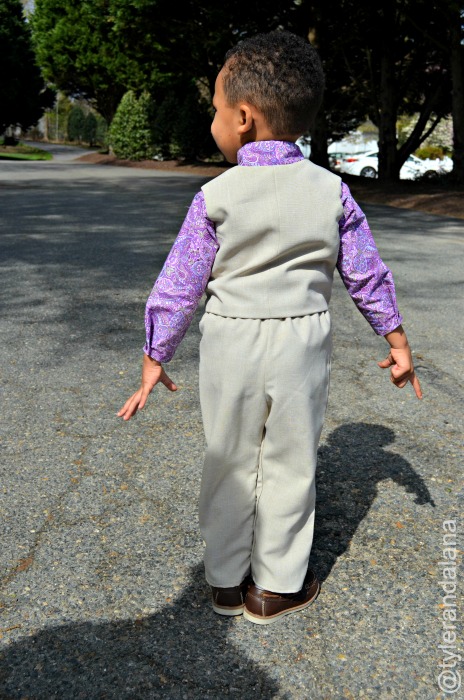
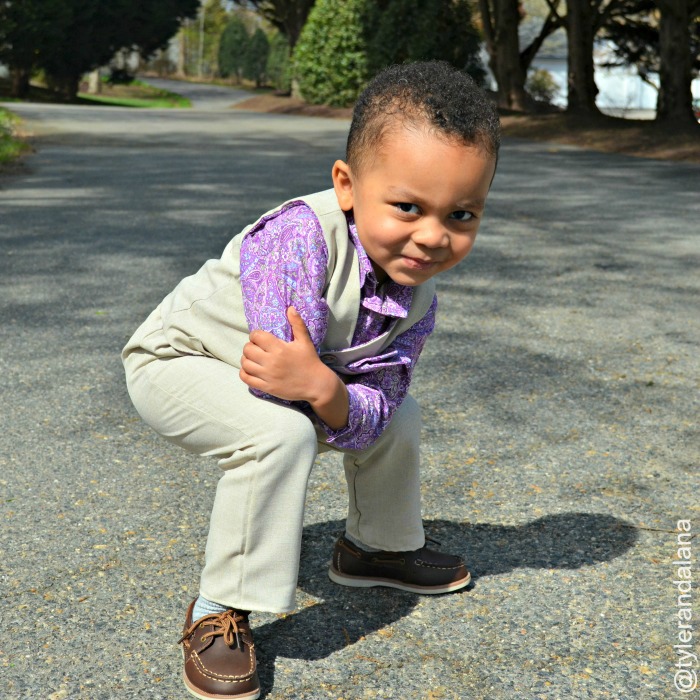
So in my previous post I mentioned that last year I made my first article of clothing. Last year, I felt that my daughter's Easter dress was so difficult that I couldn't even make anything for my son like I had hoped. Yes, I felt bad. So this year I went all out for him. I wanted my son and daughter's outfit to stay in the same color pallete so I found a really nice purple cotton and a nice neutral suiting fabric to complete his look.I decided to make my son a vest, a pair of pants, and a button-up shirt. My husband was the happiest I think. Only because I haven't made anything that looked in the least bit masculine. He absolutely loved it. He even had the nerve to say that it was the best thing I ever made. Oh please! SMH! Even my mom who has been sewing longer than I've been alive, was looking for tags on the clothes because she couldn't believe that I made this. How rude! LOL!So, the pattern that I used to create this entire look was M6873. It has everything that you see above + more. Now for the review....this pattern doesn't have any waist measurements like adult patterns do so if you want to make it for you little ones, I feel that this pattern only works for maybe Newborn -2 years. I guess it depends on the size of your child. My son is 2 years old and I used the largest size in the pattern. The pattern does mention that it is EASY. I would have to disagree. It's not that difficult but I would say it's difficulty is in the middle. The vest was easy until the last step when it came connecting the sides of the vest together. It was quite difficult to maneuver while sewing, but I was able to manage it. (Tip:when connecting the sides, sew the outside of the vest first, then slipstitch the lining to hide any stitching.) The pants were probably the easiest. I did not add a cuff because I don't really like that look. One thing I must mention though. The pants were quite baggy or loose. They almost had the look of gauchos. I prefer slimmer pants so used a 1.5 seam allowance on the outside and inner leg and used my serger on the edges to cut the extra seam allowance. As for the button-up, that was the most difficult because the sleeves did not match up to the front and back of the shirt. When I used a 5/8 inch seam allowance, wrinkles and creases were created allowing for it to look messy and unprofessional. This also happened when I attempted to sew the collar. So in order for me to sew everything together with a neat appearance, I had to use a smaller seam allowance, maybe 1/4 inch. The button-up was definitely my biggest headache.
Button-up: DIY Vest: DIY Pants: DIY Shoes: Target


Thanks for stopping by. XOXO