designer look for less: Markarian
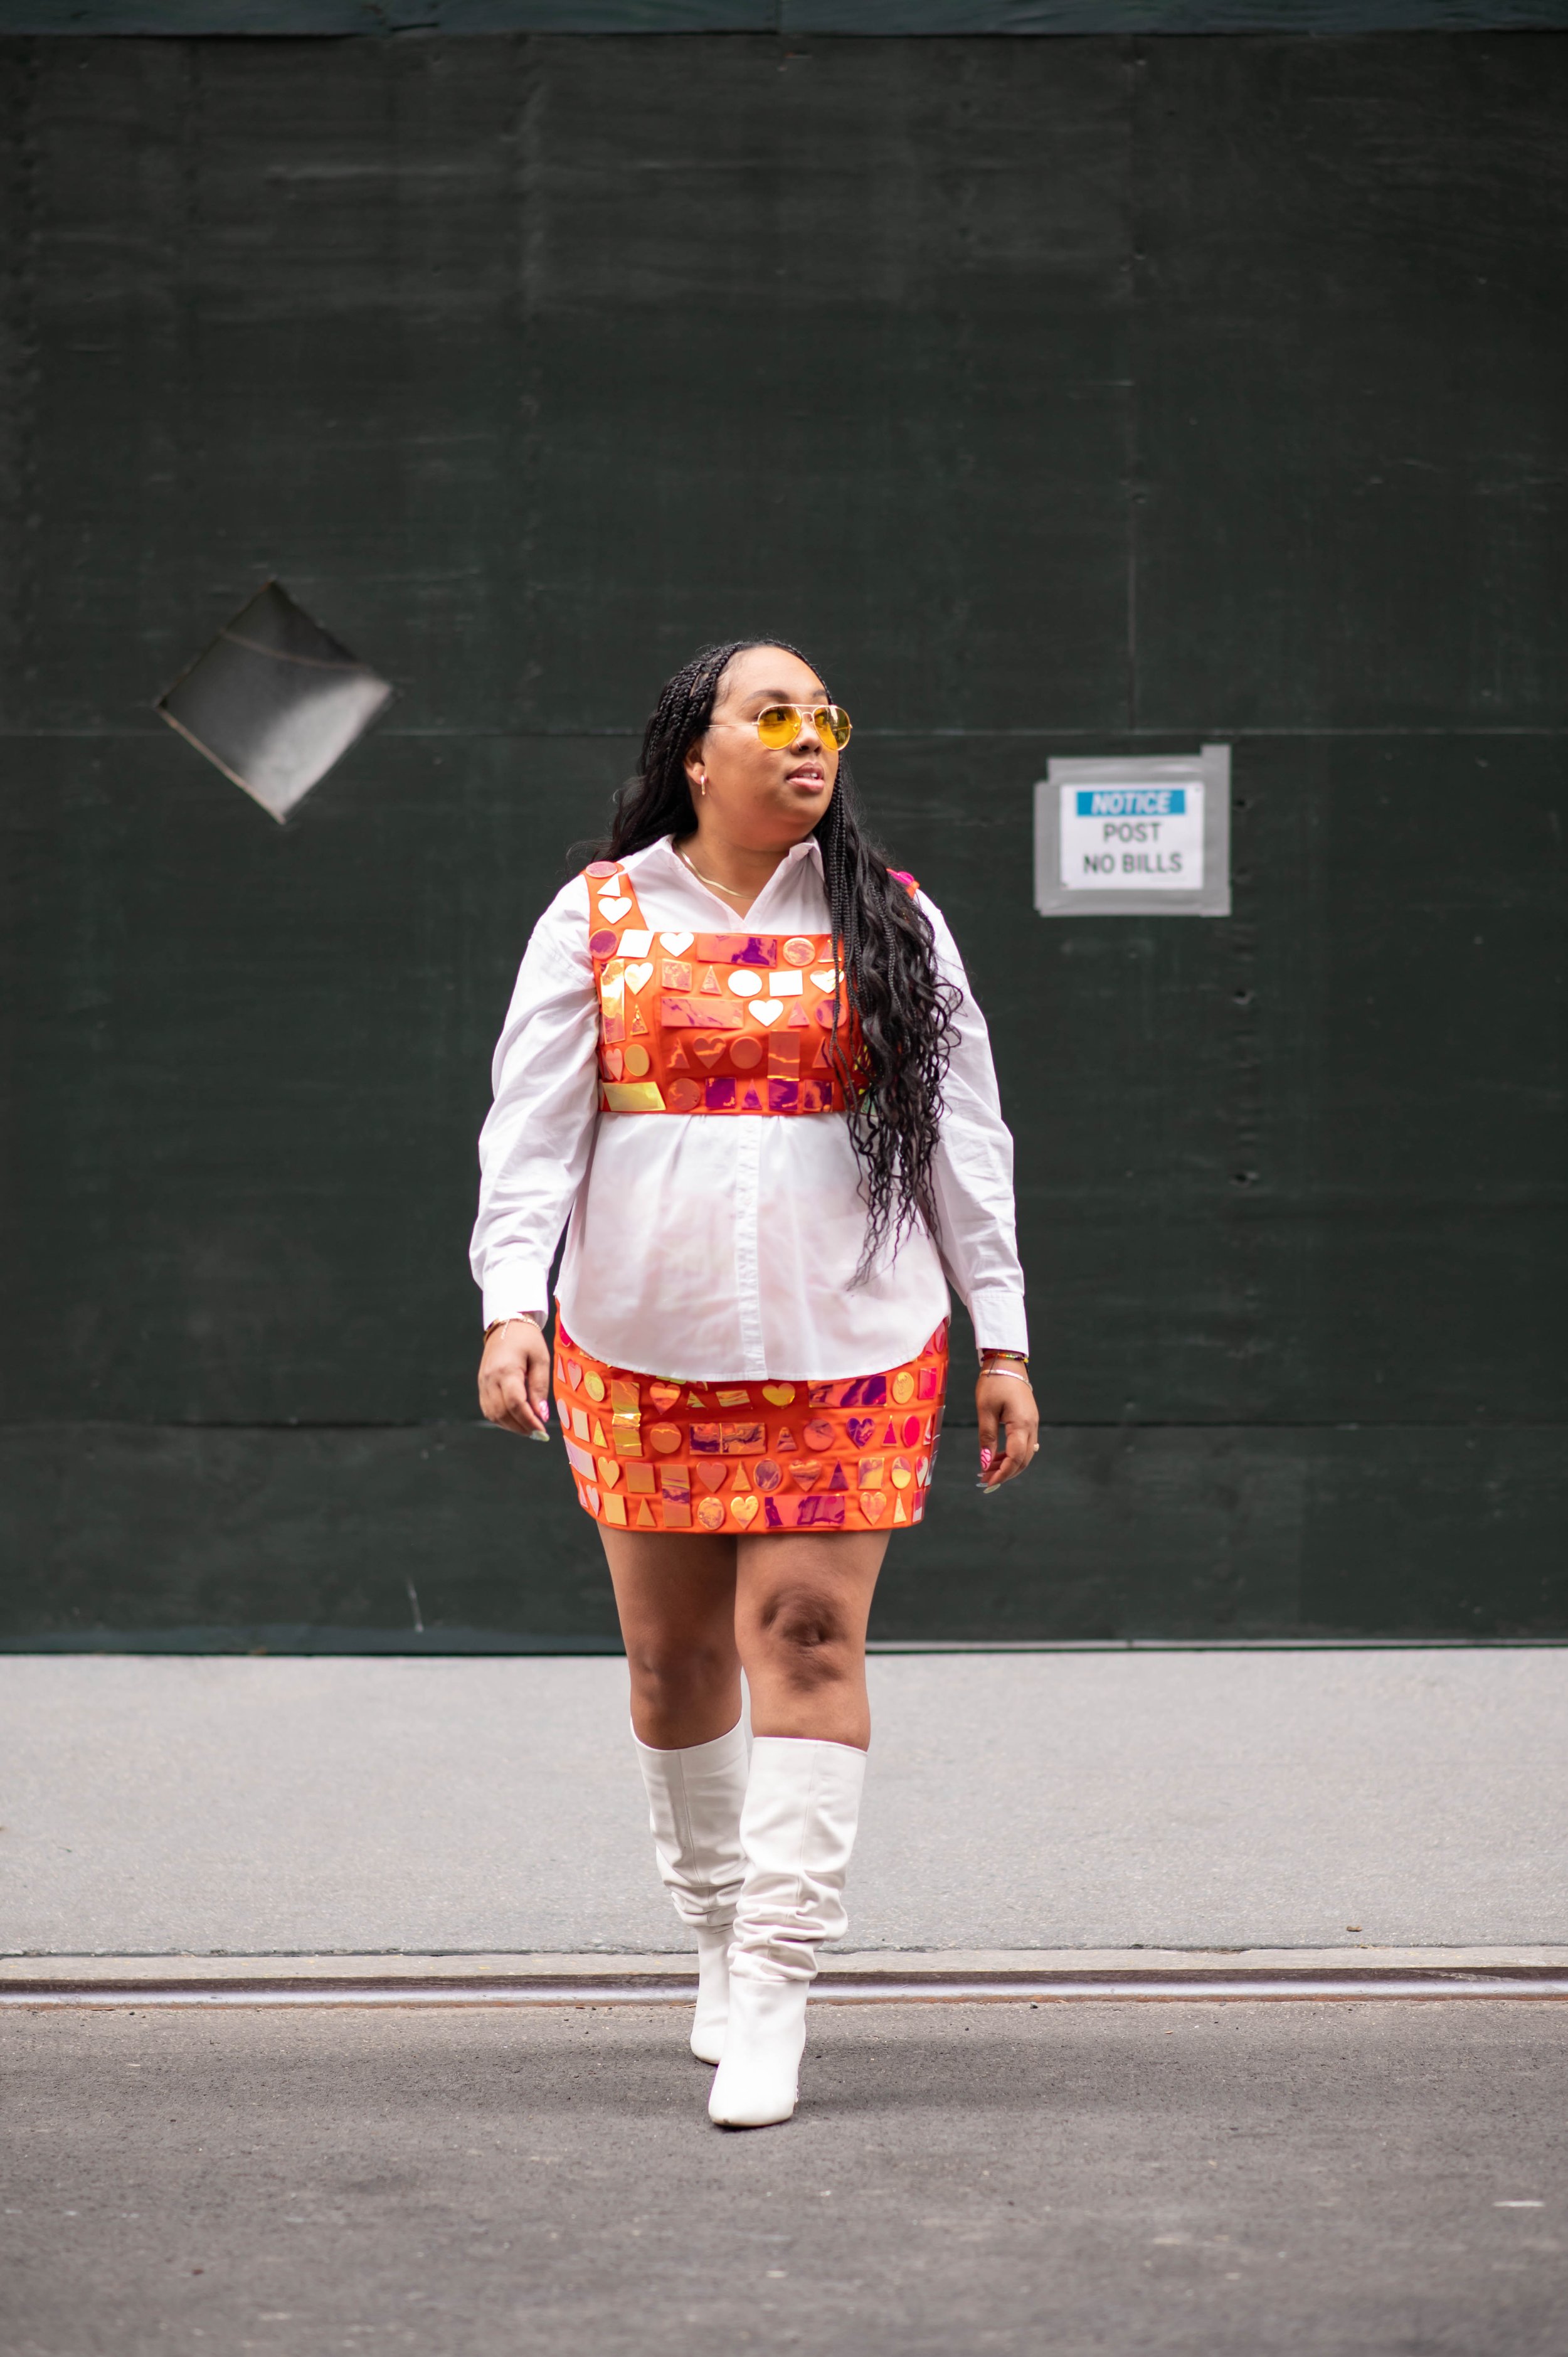
I came across this look while scrolling through Pinterest. (Does anyone look at Pinterest anymore?) Of course, I was immediately drawn to the the shiny elements of the dress (all things that glitter and shine have me in a chokehold). I was then drawn to the playful shapes. I love the child-like vibe this dress has but was immediately thrown off by the price. Can you believe it’s $6100?!

I knew this was a piece that I had to have in my closet so, I had to figure out how to create this. Let me preface by saying trying to figure out what resources was available for me to create this look so that you all can make it too was difficult. I was literally thinking ‘What is easily accessible for anyone to make this?‘ The shapes on this dress was made from an acrylic material. I had to figure out an alternative to this but making sure I still had the desired thickness of the material and the shine. I settled on a foam sheet for the thickness and the craft vinyl for the shine.

As for the wearability of this garment, I would call this wearable art. I wouldn’t recommend wearing it for a long period of time or wear you’re going to be moving a lot. It is a very fragile piece so wear it with care. The shapes didn’t fall off but the vinyl had a tendency of peeling off in areas where the garment would crease.
Although this was a piece, I wouldn’t be able to wear often, I loved the creative process of creating it. I thrive off of design challenges and this was definitely a challenge.


MATERIALS
Top: New Look 6722
Skirt: McCalls 8051
Tangerine Cotton Fabric
Interfacing
3-4 Orange Foam Sheets
Holographic Craft Vinyl
Brother ScanNCut
Fabric Glue
Books or Pattern Weights
HOW IT’S MADE
Create the base of the garment in accordance to the pattern instructions.
For the shapes:
Apply the craft vinyl the the foam sheets.
Create the cut files by create your basic shapes.
Adhere the foam sheet to the cutting mat and insert into your Brother ScanNCut.
Proceed with cutting. [Note: Cut out one shape at a time. Cut at a minimum 50 per shape.]
To Assemble:
Starting with the top, plan out your layout by placing teh shapes in the order you desire. DO NOT GLUE as of yet.
Once you have your desired layout, glue each shape in place using the fabric glue. Do not apply too much becasue you don’t want the glue to seep out on to the sides of the shapes. Apply a weight to the shapes to ensure proper adherance.
Once dry, repeat these steps for the skirt.

STYLING
I had fun styling this look. I wore a white button down shirt as a base layer, the the orange crop over that. I wore my white knee high boots to balance out the white on top and topped it off with my yellow aviator glasses.


